

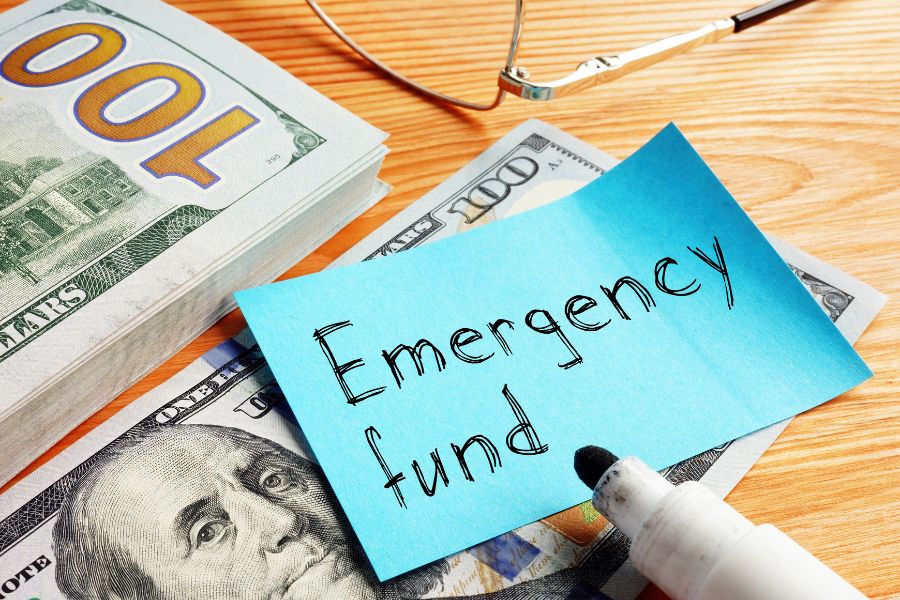
Starting a 52-week savings challenge honestly felt impossible when I had zero emergency savings last year. My paycheck vanished every month, and I’ll admit, setting aside money seemed overwhelming.
I needed something simple—nothing fancy or complicated. I wanted a system that wouldn’t wreck my budget, but could still help me build up some financial security.
The 52-week challenge let me save $2,600 by tucking away just $50 each week for a year. No complex formulas, no giant leaps. I just started with week one, saved $50, and kept it going every single week until I reached my goal.
What really surprised me? The savings piled up way faster than I expected. The weekly routine became kind of automatic after a while.
Turns out, building an emergency fund doesn’t need drastic lifestyle changes or flawless budgeting. It just takes a bit of consistency and a plan that actually fits your life.
Key Takeaways
- The 52-week challenge helps you build up emergency savings with steady, manageable deposits each week.
- Simple tracking tools and realistic goals keep you motivated all year long.
- Small weekly habits add up to real financial security—no need for a total budget overhaul.
How the 52-Week Challenge Works
The 52-week money challenge uses a super simple formula. You save money based on the week number.
You can tweak the amounts to fit your budget. There are different challenge styles, so you can actually reach your goals without feeling squeezed.
Week-by-Week Strategy Explained
I kicked off my challenge by saving $1 the first week. Week two, I put away $2. Week three, $3.
The pattern kept going. By week 26, I saved $26. The last week? $52. That felt doable after months of practice.
This gradual approach helped me avoid the shock of suddenly saving huge amounts. Using the standard formula, my total hit $1,378.
Weekly breakdown for milestones:
- Weeks 1-13: $1-$13 (total saved: $91)
- Weeks 14-26: $14-$26 (total saved: $351)
- Weeks 27-39: $27-$39 (total saved: $624)
- Weeks 40-52: $40-$52 (total saved: $1,378)
It gets tougher near the end. December hit me with $49, $50, $51, and $52 in just four weeks.
Customizing the Challenge to Fit Your Budget
I decided to double the standard amounts to reach my $2,600 goal. Instead of $1 the first week, I saved $2.
You can adjust the challenge however you want. Multiply each week by a number that matches your income.

Popular customization options:
- Half challenge: Save $0.50, $1.00, $1.50 (total: $689)
- Double challenge: Save $2, $4, $6 (total: $2,756)
- Reverse challenge: Start with $52, end with $1
- Flat rate: Save $26.50 weekly (total: $1,378)
If you expect less cash later in the year, try the reverse method. You tackle the hardest weeks first, when motivation’s high.
Flat rate? Not exactly thrilling, but honestly, it’s practical. No mental math, just set up automatic transfers and forget it.
Types of 52-Week Money Challenges
The standard challenge bumps up your savings by $1 each week. Most people start here—low commitment, easy entry.
The reverse 52-week challenge flips the script. You start with $52 in week one and drop down to $1 by week 52.
I tried the bi-weekly challenge too. Saved every two weeks, doubled the amounts, and only had 26 transactions to handle.
Monthly variations roll four weeks into one payment. Weeks one through four equal $10 in month one, weeks five through eight add up to $26 in month two.
The penny challenge? Start with a cent, add a penny every day. You’ll save $3.65 in a year—not life-changing, but good for building habits.
Digital envelope challenges use apps to round up your purchases. Every transaction rounds up, and the difference slides into savings.
Setting Up Your Emergency Fund for Success
Building an emergency fund takes a little planning and some smart choices about where to stash your money.
You’ll want to figure out how much you need, pick the right account, and set up a system for regular contributions.
Calculating Your Ideal Emergency Fund Goal
I started by figuring out exactly how much I’d need for emergencies. Most experts say three to six months of living expenses.
First, I calculated my monthly essentials—rent, utilities, groceries, insurance, minimum debt payments. I wrote down every must-pay bill.
My total came to $1,200 per month. Multiplied by three months, my starter goal was $3,600.
Here’s how my monthly costs broke down:
| Expense Category | Monthly Amount |
|---|---|
| Rent/Housing | $600 |
| Utilities | $120 |
| Groceries | $300 |
| Insurance | $80 |
| Transportation | $100 |
| Total | $1,200 |
I aimed for three months first. Once I hit that, I planned to stretch for six months’ worth.
Choosing the Right Account for Savings
I wanted my emergency fund safe, but still easy to grab if needed. A high-yield savings account checked all my boxes.
Regular checking accounts barely pay any interest. I wanted my money to grow, even a little, while I saved.

I hunted for accounts with no monthly fees and easy online access. The interest rate had to be decent, too.
What I looked for:
- High interest rate (over 4% APY)
- No monthly maintenance fees
- FDIC insurance
- Easy online transfers
- No minimum balance
I opened my emergency fund at a different bank than my checking account. That way, I didn’t accidentally spend it.
Having a separate account also made it easier to track my progress. I could see exactly how much I’d set aside for emergencies.
Establishing Consistent Contributions
Consistency made all the difference for me. I set up automatic savings so I couldn’t just skip a week.
Every Friday, right after payday, my checking account sent money to my emergency fund. It lined up perfectly with the 52-week challenge.
I treated that transfer like any other bill—non-negotiable.
My weekly transfer schedule:
- Week 1: $1 auto-transferred
- Week 2: $2 auto-transferred
- Week 3: $3 auto-transferred
- And so on, up to week 52
Whenever I got unexpected money like a tax refund or birthday cash, I tossed it straight into savings. Those little windfalls sped things up.
If I missed a week, I didn’t beat myself up. I just caught up the next week by doubling the deposit.
Essential Tools and Tips for Staying Motivated
Having the right tracking system and a bit of support made a huge difference for me. Celebrating small wins kept me fired up to reach my $2,600 goal.
Tracking Progress with Binders and Apps
I started off with a printable tracker in a bright binder on my kitchen counter. Filling in those boxes each week felt surprisingly satisfying.
Colorful pens made it fun, and my kids loved watching the chart fill up.
By week 20, I switched to a savings app on my phone. Updating my progress on the go was easier, and I could snap photos of deposit receipts right at the bank.
Tracking tools I liked:
- Binder with printed charts
- Smartphone apps (with photo storage)
- Simple spreadsheet with auto totals
- Wall calendar with stickers
Pick a method and stick to it. Don’t bounce between tools every few weeks like I did at first—it just gets confusing.
Building Accountability with Friends or Groups
My sister jumped in on the challenge with me around week 8. Having a buddy made a huge difference.
We texted every Sunday to share our weekly deposit amounts. That check-in kept both of us on track, especially during the tough weeks.

I also joined an online personal finance group. Seeing others’ progress stories gave me a boost when I wanted to quit.
Ways to build accountability:
- Team up with family or friends
- Join online savings groups
- Share your progress on social media
- Start a friendly competition at work
My accountability partner kept me honest when money got tight. She always reminded me—even $5 was better than nothing.
Celebrating Milestones to Stay Encouraged
Every $500 saved, I celebrated with something small. At $500, I grabbed my favorite coffee. At $1,000, I finally bought that book I’d been eyeing.
These mini rewards made the challenge feel fun—not like a punishment. The treats cost less than $20 but kept me going.
I took photos of my savings account balance at each milestone. Looking back now, those screenshots remind me how far I’ve come.
Milestone celebration ideas:
- $250: Favorite snack or drink
- $500: Small treat
- $1,000: Dinner out
- $1,500: Movie night
The real celebration came at week 52. Seeing my full emergency fund in the account felt better than any reward I could buy.
Budgeting and Saving Habits That Make the Difference
My success with the 52-week challenge really came down to three things. I built a simple budget, set up automatic transfers, and cut small expenses that added up fast.
Creating a Simple Budget to Maximize Savings
I started with a basic budget—just tracking income and expenses each month. That helped me spot extra money for the weekly challenge.
Here’s my simple budgeting formula:
- Income: Money from work and side hustles
- Fixed expenses: Rent, utilities, car, insurance
- Variable expenses: Food, gas, fun, shopping
- Savings goal: Weekly challenge amount + $50 buffer
I used a free app to track spending for two weeks. That opened my eyes to where money was really going.
The biggest shock? Small purchases. Coffee, apps, impulse buys—$150 a month, easy. I didn’t cut everything, just paid more attention.
I set aside the weekly challenge amount at the start of each month. As soon as I got paid, I moved the savings first.
Automating Your Savings Process
Automatic transfers were my secret weapon. I scheduled them for every Friday, matching my weekly challenge.
My bank let me set up all 52 transfers in January—one for each week and amount. It took half an hour, and I was done for the year.
Automation took away the need to remember or get motivated. The money moved itself.
I kept the challenge money in a separate high-yield savings account. That kept it out of sight and earned a little extra interest.
When the bigger weeks rolled around, the money was already set aside. I never felt that last-minute panic about needing $45 or $50.
If you’re thinking about starting your own 52-week challenge, just know it’s totally doable—even if you’re starting from zero. The hardest part is getting started, but trust me, the results are worth it.
Cutting Unnecessary Expenses for Weekly Contributions
Honestly, I found my challenge money by slashing expenses that didn’t really make my life better. Little tweaks here and there opened up space for weekly savings, and I never felt like I was missing out.
Monthly subscription audit: I went through my subscriptions and canceled three apps I barely touched. That alone saved me $28 a month. Then I dropped my streaming plan from premium to basic, which meant another $8 in my pocket.

Coffee shop strategy: Instead of grabbing coffee out every single weekday, I started making it at home three days a week. I still treated myself at the shop twice, and this simple switch saved me $60 a month.
Grocery planning: Meal planning became my secret weapon. I shopped with a list, which meant less food waste and fewer impulse buys. That saved about $40 each month.
Entertainment shifts: I swapped expensive nights out for free stuff like hiking or checking out events at the library. Doing this let me save around $80 monthly, and honestly, it was still a good time.
All those small cuts added up to $216 more every month. That easily covered my weekly challenge amounts, and I still had a little extra for my emergency fund.
Overcoming Common Challenges and Staying Flexible
Let’s be real—life loves to throw surprises, especially when you’re trying to save. The 52-week plan isn’t immune to those curveballs. The trick is to adapt when things get bumpy and find clever ways to catch up if you fall behind.
Adjusting for Unexpected Expenses
I realized pretty quickly that being too rigid can sabotage your emergency fund. My car needed $300 in repairs during week 15. I had to make a choice: give up or figure it out.
Instead of quitting, I just cut my weekly savings in half for three weeks. Week 15 dropped to $7.50 instead of $15. Week 16? $8 instead of $16.
My flexible approach:
- When things get tight, I cut the weekly amount by 25% or even 50%.
- I’ll skip a week if I have to, but only once, then I get right back on track.
- If I get a tax refund or a bonus, I use it to catch up.
Honestly, this challenge works because you can bend the rules a bit. I still finished the year with $1,200 saved. That’s way better than nothing.
Some weeks, I could only toss spare change into the fund. Other times, I found a forgotten $20 in my jeans and felt like a hero. Perfection isn’t the goal—progress is.
Making Up Missed Weeks in the Challenge
Everyone misses a week sometimes. I totally blanked on week 23 during a hectic work stretch.
Here’s what I did to catch up without getting stressed:
Double-up method: I saved both weeks 23 and 24 together ($23 + $24 = $47) in week 24.
Spread-out method: I added $5 extra to my savings for the next four weeks instead of trying to cough up $23 at once.
Bonus method: My birthday money covered the missed week, which felt like a win.

The best part? Missing a week doesn’t wreck your emergency fund dreams. By staying flexible, I actually finished the year $200 ahead.
I keep track of missed weeks in my phone. I note which one I missed and how I’ll make it up. It keeps me honest, but I don’t beat myself up over it.
Frequently Asked Questions
People ask me all the time about the nuts and bolts of the 52-week challenge. The questions range from setup basics to ways to supercharge your savings for bigger goals, like $5,000 or even $10,000.
What is the step-by-step method for starting the 52-week savings challenge?
First, I open a separate savings account just for this challenge. It keeps my emergency fund safe from my day-to-day spending.
In week 1, I save $1. Week 2, $2. Week 3, $3. I keep going until week 52, when I save $52.
I set up automatic transfers from checking to savings every Friday. That way, I can’t “forget” to save.
I track everything on my phone or computer. Each week, I jot down the amount and update the total.
How do you successfully complete the 52-week money challenge to build an emergency fund?
I treat my weekly savings like a bill—non-negotiable. If I skip a week, catching up gets harder.
If I miss a week, I’ll double up the next one or spread the missed amount over future weeks. Flexibility is key, not perfection.
Cutting small expenses helps me find extra money. Skipping a coffee or cooking dinner covers several weeks’ worth of savings.
When saving feels tough, I remind myself that $1,378 could cover three months of basics. That motivation keeps me moving forward.
Can the 52-week challenge be adapted to save more, such as $5,000 or $10,000, within a year?
Absolutely. I just multiply each week’s amount. Saving $2 in week 1, $4 in week 2, and so on, doubles my total to $2,756.
For $5,000, I multiply each week by 3.6. So week 1 becomes $3.60, week 2 is $7.20, etc.
To hit $10,000, I multiply by 7.2. That means saving $374.40 in the final week, which is a stretch unless your income allows.
Sometimes, I run two challenges at once—a regular and a doubled version. That gets me $4,134 by year’s end.
Are there tools or calculators available to help track progress in the 52-week savings challenge?
I use free apps made for the 52-week challenge. They send reminders and show my progress in charts.
A lot of banks have savings trackers in their mobile apps. I set my goal and watch my progress climb.
I made a simple spreadsheet with columns for week, amount, and running total. It helps me see where I stand.
Online calculators are handy, too. I play with the numbers to see how different amounts add up.
Where can I find a printable PDF guide for the 52-week savings challenge?
There are tons of free printable trackers online. I just search for “52-week challenge printable PDF” and pick one I like.
Banks and credit unions sometimes offer these guides too. My local bank had a fun, colorful version I printed at home.
I even made my own tracker in Word with columns for the week, amount, date, and total saved.
Pinterest is full of creative designs—some have motivational quotes and cute borders. Makes saving a little more fun, honestly.
What are the benefits of beginning the 52-week savings challenge with a higher initial amount?
Starting with a bigger deposit really jump-starts my emergency fund. If I toss in $10 in week one instead of just a dollar, I start to see progress way faster.
That early momentum? It’s a game-changer. Watching $100 pile up in the first weeks actually makes me want to keep going.
I like to tweak the challenge to fit my own pay schedule. For example, if I know I’ll earn more in January than December, starting high just feels right.
Honestly, I’ve noticed those bigger early amounts help when expenses spike later on. The holidays hit hard in December, so having a head start takes the pressure off.
